How to Set Up A/B Testing in Astro (Translated)
A/B testing helps you improve your Astro app by comparing how changes affect key metrics. To show how to set up A/B testing, we’ll create a basic Astro app, add PostHog, create an experiment, and implement the code.
High-level plan
-
Environment setup
- Install Node.js (v18+) and initialize an Astro project
- Create a basic page structure (title + button interaction)
-
Integrate analytics
- Inject the PostHog Web snippet
- Create a layout component to manage tracking code
- Verify event collection
-
Define experiment metrics
- Capture a custom button-click event
- Configure event properties tied to user behavior
-
Create A/B experiment groups
- Configure multi-variant experiment in PostHog
- Set the primary conversion metric (button click rate)
-
Implement experiment logic
- Client-side rendering: get feature flags in real time but causes UI flicker
- Server-side rendering: prefetch flags with Node SDK to stabilize first paint
Implementation options
Client-side rendering
// src/components/posthog.astro
loaded: (posthog) => {
  posthog.onFeatureFlags(() => {
    const button = document.querySelector('.main-button');
    const variant = posthog.getFeatureFlag('my-cool-experiment');
    button.innerText = {
      control: 'Control variant',
      test: 'Test variant'
    }[variant] || 'Default copy';
  });
}
Steps:
- Register feature flag listener after PostHog loads
- Get the button DOM element
- Update text based on returned variant
- Fall back to default copy when the flag isn’t enabled
Server-side rendering
// src/posthog-node.js
export default function PostHogNode() {
  if (!posthogClient) {
    posthogClient = new PostHog('<ph_key>', {
      host: 'https://us.i.posthog.com',
      fetch: (url, options) => fetch(url, { ...options, next: { revalipubDate: 60 } })
    });
  }
  return posthogClient;
}

// pages/index.astro
const distinctId = ctx.cookies.get('distinct_id') || crypto.randomUUID();
const variant = await PostHogNode().getFeatureFlag('my-cool-experiment', distinctId);
Core config:
- Create a Node.js client and set cache strategy
- Use cookies or a random ID for stable
distinctId - Prefetch feature flags on the server
- Sync client
distinctIdfor consistency
Comparison
| Dimension | Client-side rendering | Server-side rendering |
|---|---|---|
| First paint | UI flicker possible | No content jitter |
| Data freshness | Real-time flag updates | Needs cache refresh strategy |
| Complexity | Front-end only | Requires Node environment |
| SEO | Client state doesn’t affect SEO | Server renders full content |
| User ID | Depends on browser fingerprint | Customizable ID generation |
Best practices:
- Marketing experiments: client-side for fast rollout
- Core feature changes: server-side for stability
- Combine
getFeatureFlag+onFeatureFlagsfor hybrid rendering
1. Create an Astro app
First, make sure Node.js is installed (v18+). Then create a new Astro app:
Terminal
npm create astro@latestWhen prompted, name your new directory (we’ll use astro-ab-test), choose Empty, choose No for TypeScript, install dependencies, and choose No for creating a git repo.
Next, replace the code in src/pages/index.astro with a simple title and button:
index.astro
---
---
<html lang="en">
<head>
<meta charset="utf-8" />
<link rel="icon" type="image/svg+xml" href="/favicon.svg" />
<meta name="viewport" content="width=device-width" />
<meta name="generator" content={Astro.generator} />
<title>Astro</title>
</head>
<body>
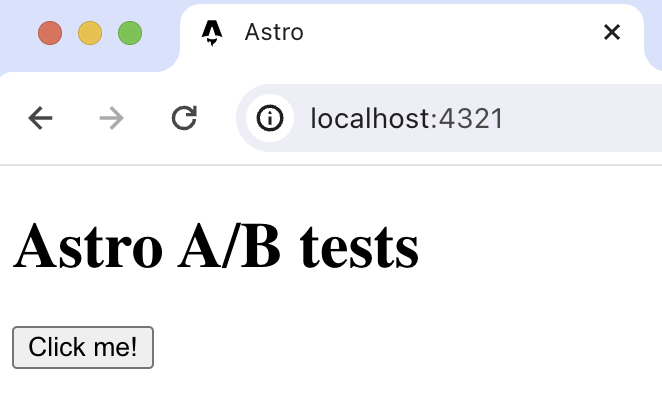
<h1>Astro A/B Testing</h1>
<button class="main-button">Click me!</button>
</body>
</html>Run npm run dev and navigate to http://localhost:4321 to view your app.
2. Add PostHog to your app
Once the app is set up, install and configure PostHog. If you don’t have a PostHog instance, you can sign up for free.
Go back to your Astro project, create a components folder under src, and create a posthog.astro file.
Terminal
cd ./src
mkdir components
cd ./components
touch posthog.astro
In this file, add your Web snippet (from Project settings).
posthog.astro
---


---
<script>
  !function(t,e){var o,n,p,r;e.__SV||(window.posthog=e,e._i=[],e.init=function(i,s,a){function g(t,e){var o=e.split(".");2==o.length&&(t=t[o[0]],e=o[1]),t[e]=function(){t.push([e].concat(Array.prototype.slice.call(arguments,0)))}}(p=t.createElement("script")).type="text/javascript",p.crossOrigin="anonymous",p.async=!0,p.src=s.api_host+"/static/array.js",(r=t.getElementsByTagName("script")[0]).parentNode.insertBefore(p,r);var u=e;for(void 0!==a?u=e[a]=[]:a="posthog",u.people=u.people||[],u.toString=function(t){var e="posthog";return"posthog"!==a&&(e+="."+a),t||(e+=" (stub)"),e},u.people.toString=function(){return u.toString(1)+".people (stub)"},o="capture identify alias people.set people.set_once set_config register register_once unregister opt_out_capturing has_opted_out_capturing opt_in_capturing reset isFeatureEnabled onFeatureFlags getFeatureFlag getFeatureFlagPayload reloadFeatureFlags group updateEarlyAccessFeatureEnrollment getEarlyAccessFeatures getActiveMatchingSurveys getSurveys getNextSurveyStep onSessionId".split(" "),n=0;n<o.length;n++)g(u,o[n]);e._i.push([i,s,a])},e.__SV=1)}(document,window.posthog||[]);
  posthog.init(
    '<ph_project_api_key>',
    {
      api_host:'https://us.i.posthog.com',
    }
  )
</script>
Next, create a layout where we include posthog.astro. In src, create a new layouts folder and a Layout.astro file:
Terminal
cd .. && cd .. # if you are still in src/components/posthog.astro, go back
cd ./src
mkdir layouts
cd ./layouts
touch Layout.astro
Add the following to Layout.astro:
Layout.astro
---
import PostHog from '../components/posthog.astro'
---
<head>
    <PostHog />
</head>
Finally, update index.astro to use the new layout:
index.astro
---
import Layout from '../layouts/Layout.astro';
---
<Layout>
<html lang="en">
<head>
<meta charset="utf-8" />
<link rel="icon" type="image/svg+xml" href="/favicon.svg" />
<meta name="viewport" content="width=device-width" />
<meta name="generator" content={Astro.generator} />
<title>Astro</title>
</head>
<body>
<h1>Astro A/B Testing</h1>
<button class="main-button">Click me!</button>
</body>
</html>
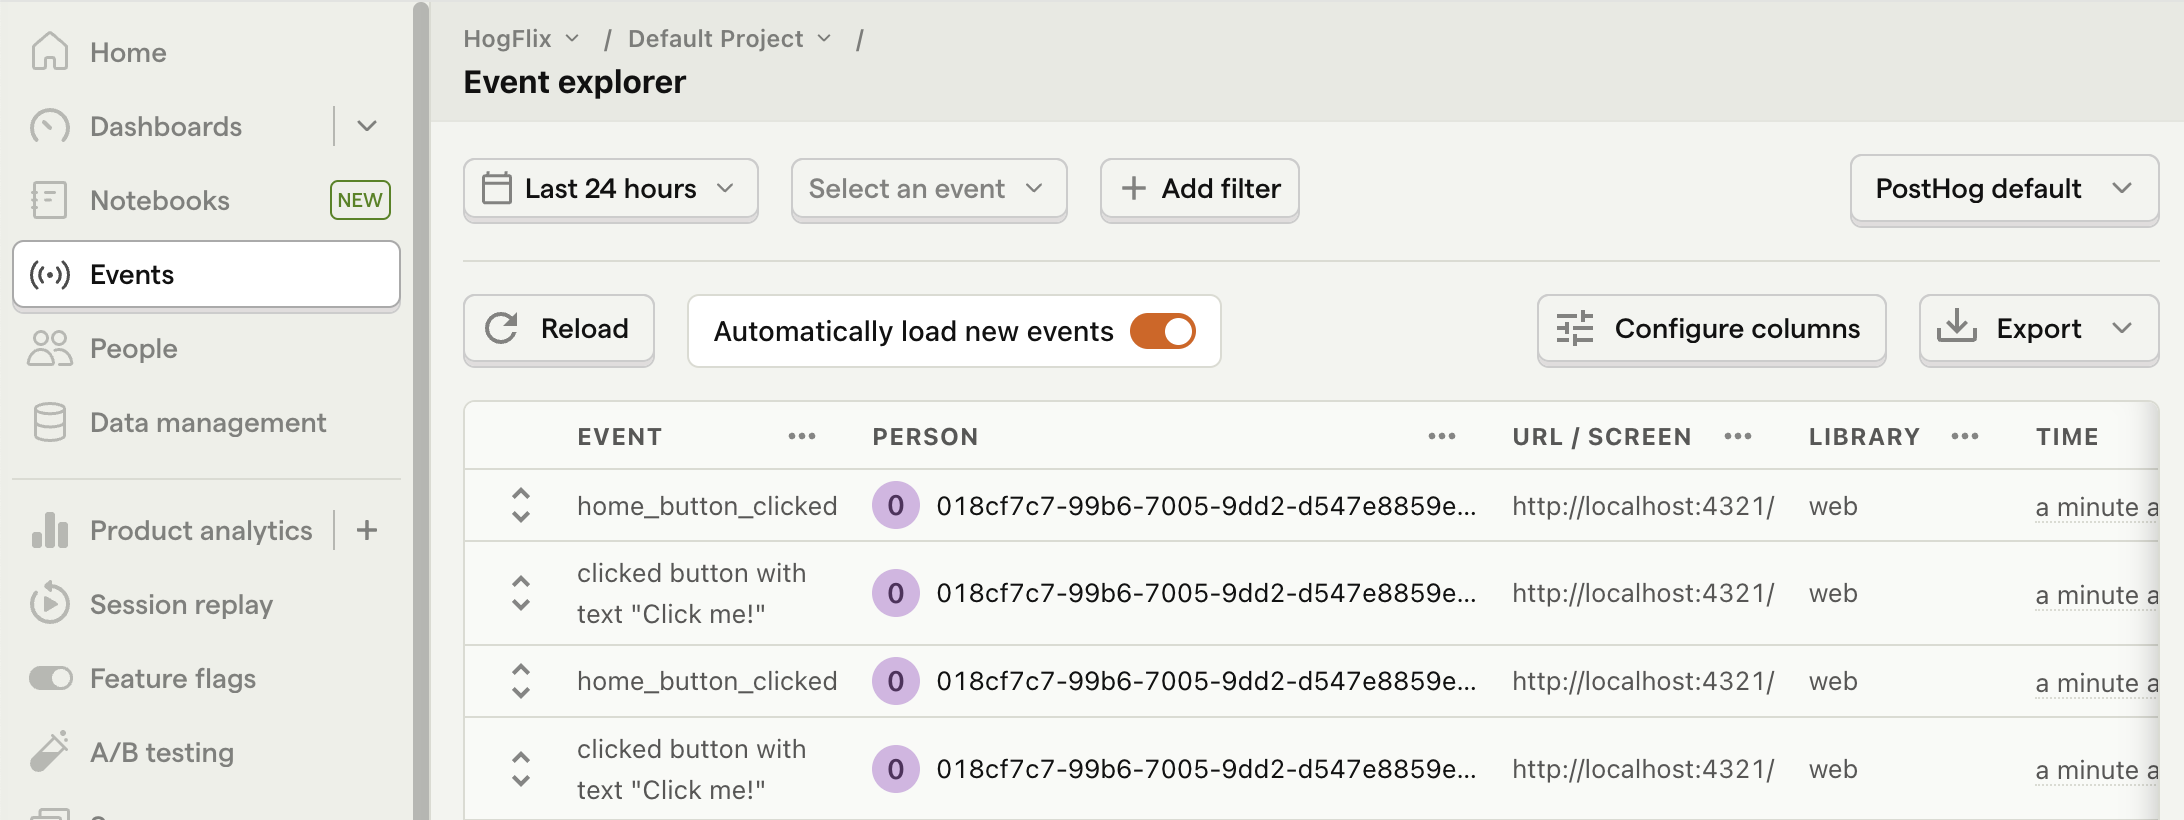
</Layout>Once done, reload your app and click the button a few times. You should see events in the PostHog event explorer.
3. Capture a custom event
The first step to setting up A/B testing in PostHog is to define a target metric. We’ll use the button click count.
To measure this, capture a custom event home_button_clicked when the button is clicked. Update posthog.astro by adding a <script> and calling posthog.capture() on click.
index.astro
---
import Layout from '../layouts/Layout.astro';
---
<Layout>
<html lang="en">
<head>
<meta charset="utf-8" />
<link rel="icon" type="image/svg+xml" href="/favicon.svg" />
<meta name="viewport" content="width=device-width" />
<meta name="generator" content={Astro.generator} />
<title>Astro</title>
</head>
<body>
<h1>Astro A/B Testing</h1>
<button class="main-button">Click me!</button>
<script>
const button = document.querySelector('.main-button');
button.addEventListener('click', () => {
window.posthog.capture('home_button_clicked')
});
</script>
</body>
</html>
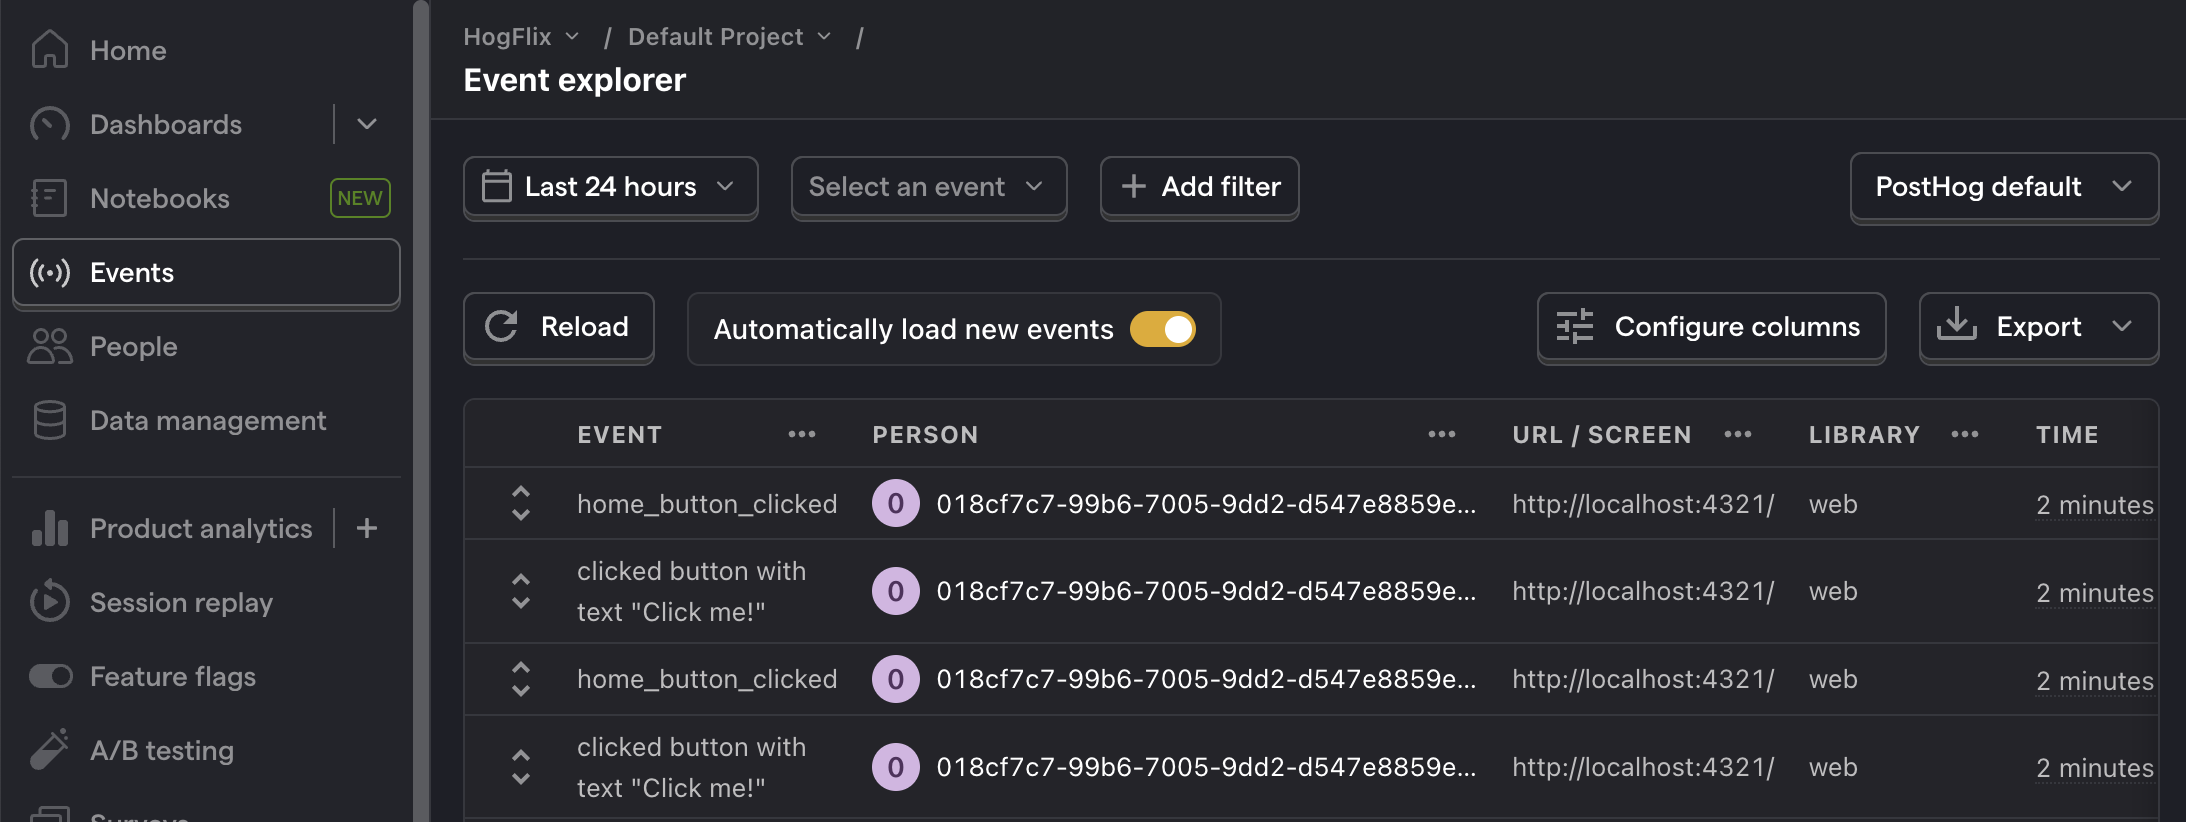
</Layout>After this, refresh and click the button a few times to see captured events in PostHog.
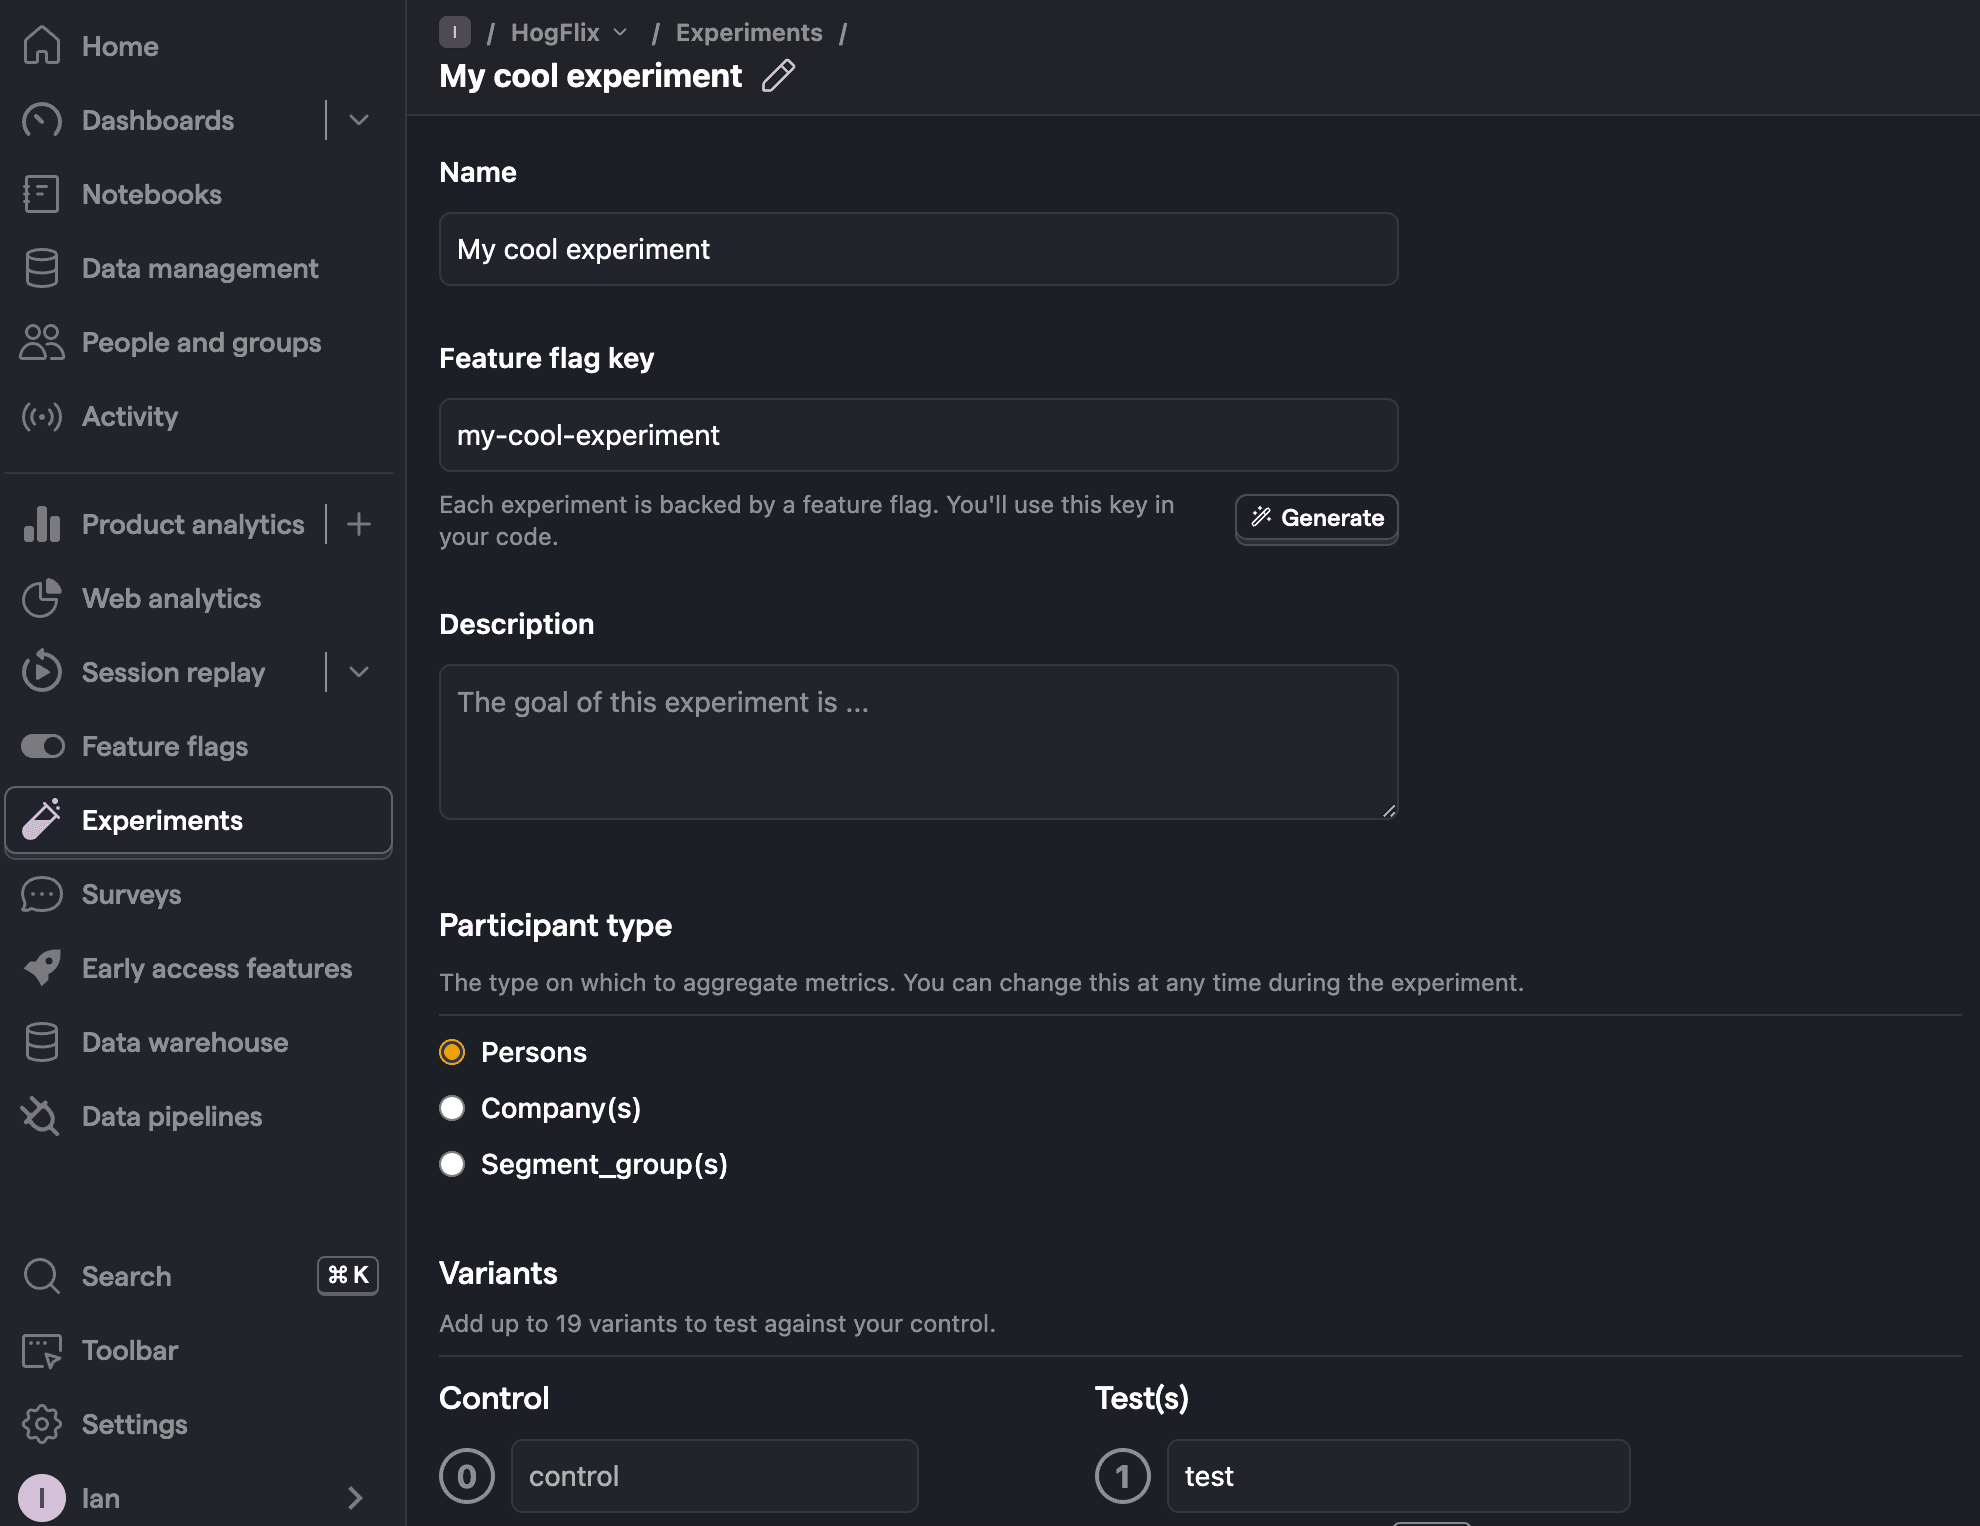
4. Create an A/B test in PostHog
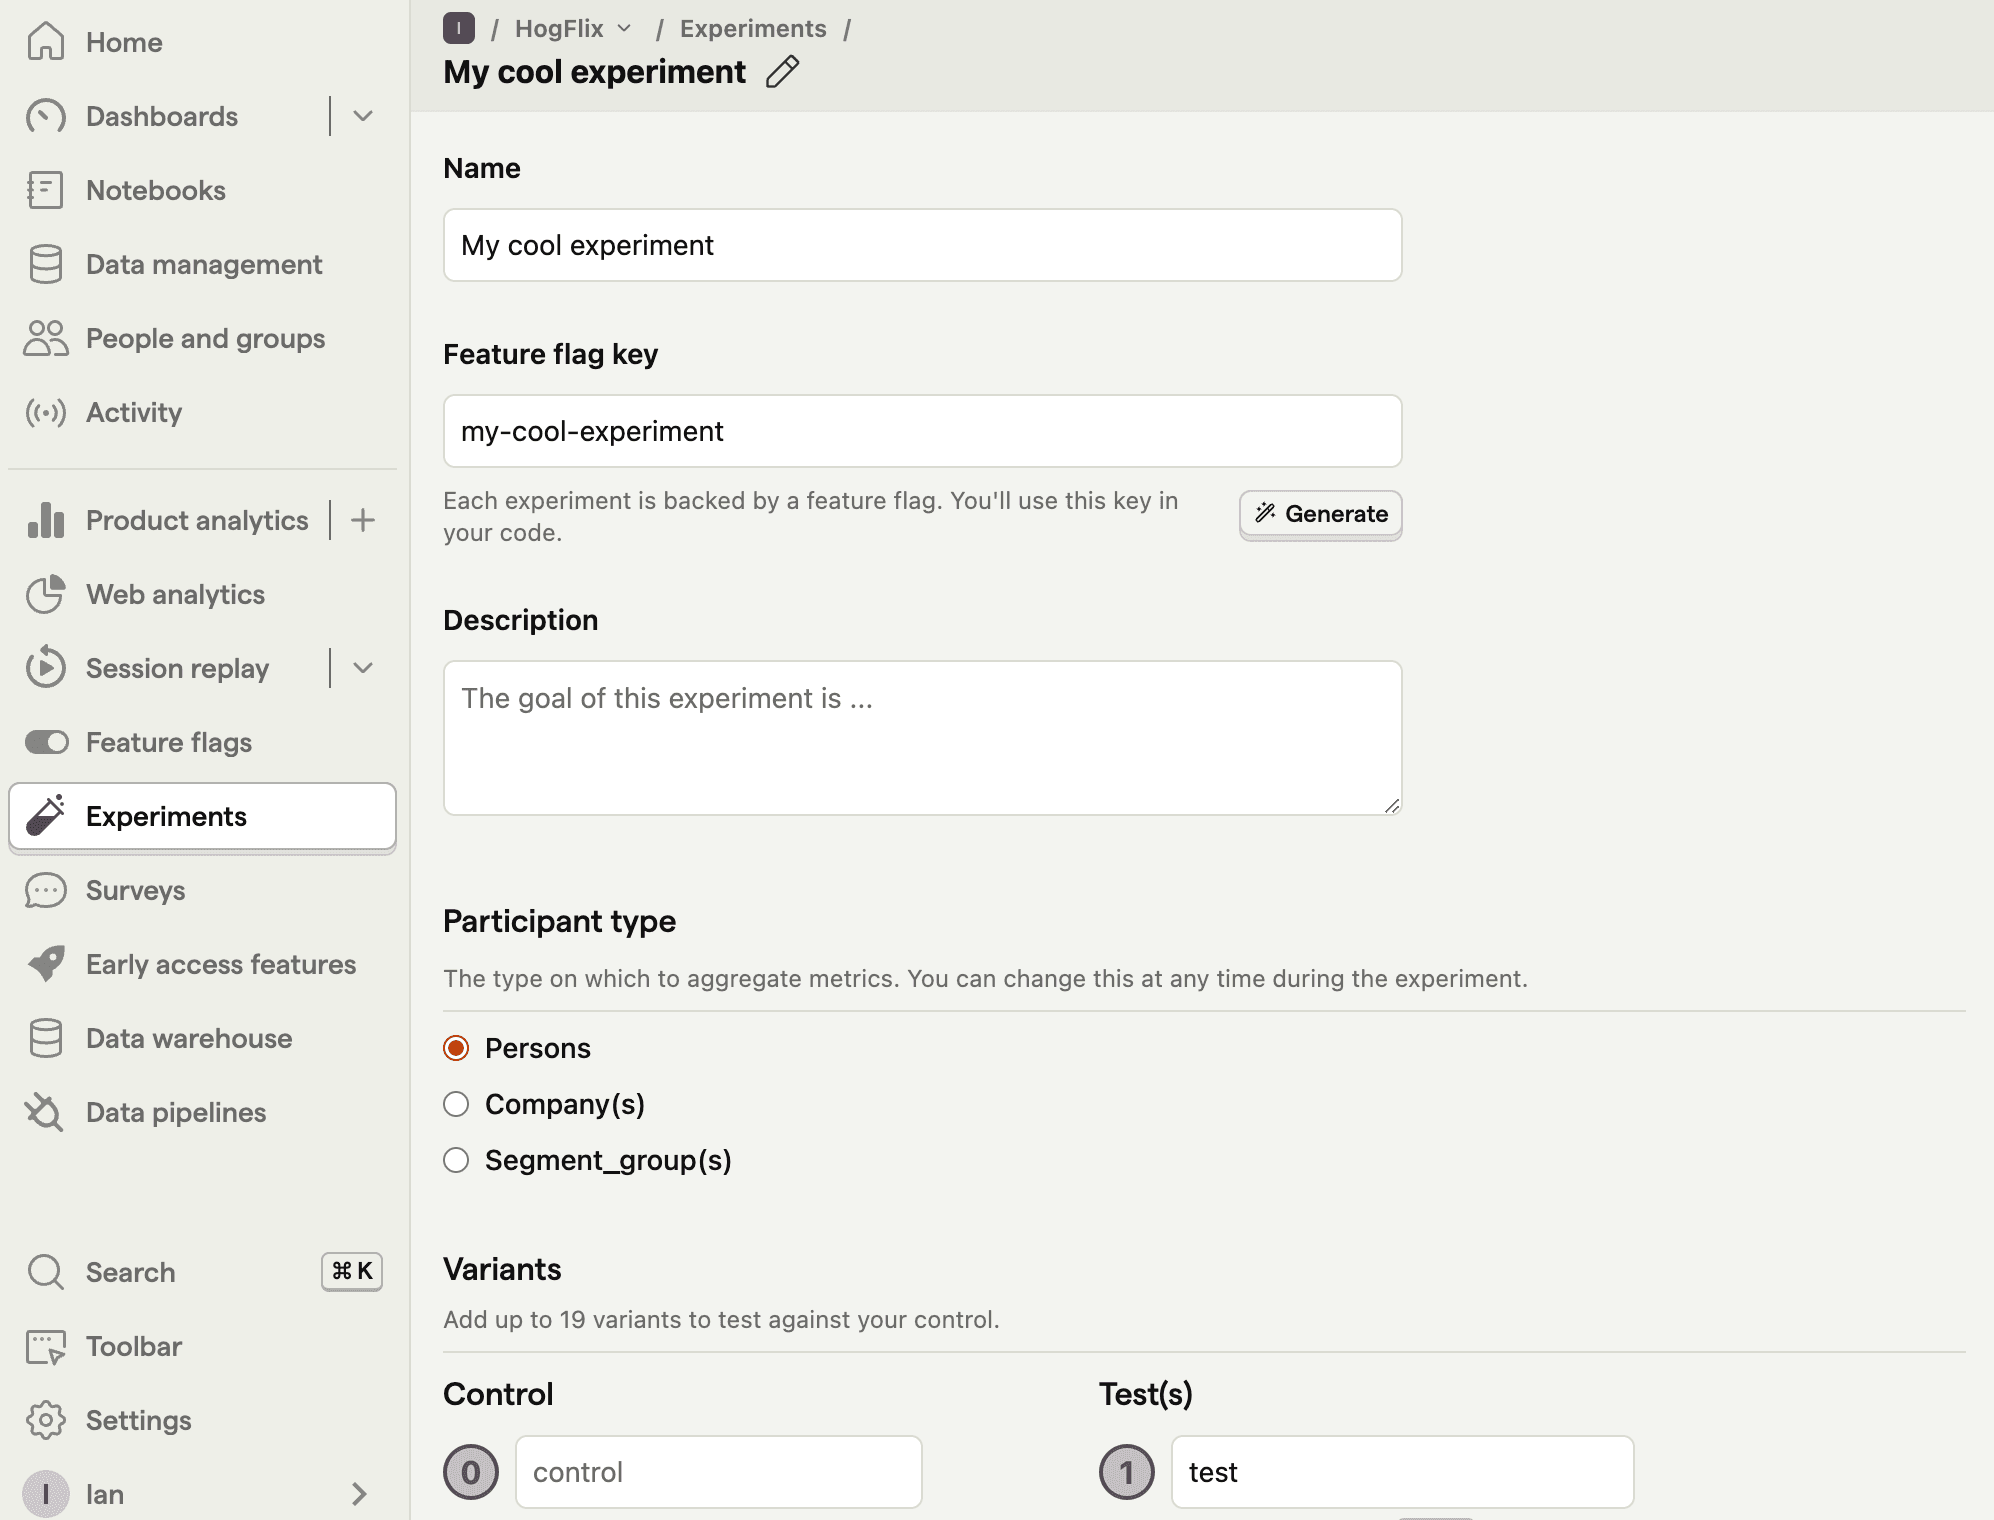
Next, go to the A/B Testing tab and click New experiment. Configure:
- Name it “My Cool Experiment”.
- Set “Feature flag key” to
my-cool-experiment. - Use defaults for everything else.
- Click Save as draft.
After creation, set the primary metric to the trend of home_button_clicked, then click Start.
5. Implement A/B test code
When implementing the experiment code, you have two options:
- Client-side rendering
- Server-side rendering
We’ll show both.
Client-side rendering
To implement A/B testing, use the posthog.onFeatureFlags callback and update the button text based on whether the user is in control or test.
Update /components/posthog.astro and add posthog.onFeatureFlags in the loaded callback:
posthog.astro
---


---
<script>
  !function(t,e){var o,n,p,r;e.__SV||(window.posthog=e,e._i=[],e.init=function(i,s,a){function g(t,e){var o=e.split(".");2==o.length&&(t=t[o[0]],e=o[1]),t[e]=function(){t.push([e].concat(Array.prototype.slice.call(arguments,0)))}}(p=t.createElement("script")).type="text/javascript",p.crossOrigin="anonymous",p.async=!0,p.src=s.api_host+"/static/array.js",(r=t.getElementsByTagName("script")[0]).parentNode.insertBefore(p,r);var u=e;for(void 0!==a?u=e[a]=[]:a="posthog",u.people=u.people||[],u.toString=function(t){var e="posthog";return"posthog"!==a&&(e+="."+a),t||(e+=" (stub)"),e},u.people.toString=function(){return u.toString(1)+".people (stub)"},o="capture identify alias people.set people.set_once set_config register register_once unregister opt_out_capturing has_opted_out_capturing opt_in_capturing reset isFeatureEnabled onFeatureFlags getFeatureFlag getFeatureFlagPayload reloadFeatureFlags group updateEarlyAccessFeatureEnrollment getEarlyAccessFeatures getActiveMatchingSurveys getSurveys getNextSurveyStep onSessionId".split(" "),n=0;n<o.length;n++)g(u,o[n]);e._i.push([i,s,a])},e.__SV=1)}(document,window.posthog||[]);
  posthog.init(
    '<ph_project_api_key>',
    {
      api_host:'https://us.i.posthog.com',
      loaded: (posthog) => {
        posthog.onFeatureFlags(() => {
          const button = document.querySelector('.main-button');
          if (posthog.getFeatureFlag('my-cool-experiment') === 'control') {
            button.innerText = 'Control variant';
          } else if (posthog.getFeatureFlag('my-cool-experiment') === 'test') {
            button.innerText = 'Test variant';
          }
        });
      }
    }
  )
</script>
Now refresh your app and you should see the button text update to Control variant or Test variant. Users are automatically assigned to one of the two, and PostHog continues to track button clicks so you can view results.
Server-side rendering
Notice that on refresh, the button text flickers between Click me! and Control/Test variant. This happens because PostHog needs time to load and fetch feature flags.
Server-side rendering avoids this by fetching flags before the client loads.
To do this, install PostHog’s Node library (because we need server-side requests).
Terminal
npm install posthog-nodeCreate posthog-node.js in src. This sets up the PostHog Node client. You can find your API key and instance URL in Project settings.
src/posthog-node.js
import { PostHog } from 'posthog-node';


let posthogClient = null;


export default function PostHogNode() {
  if (!posthogClient) {
    posthogClient = new PostHog('<ph_project_api_key>', {
      host: 'https://us.i.posthog.com',
    });
  }
  return posthogClient;
}
Next, import posthog-node.js into pages/index.astro, then use it to get the feature flag and update the button text:
index.astro
---
import Layout from '../layouts/Layout.astro';
import PostHogNode from '../posthog-node.js';


let buttonText = 'No variant'
try {
  const distinctId = 'placeholder-user-id'
  const enabledVariant = await PostHogNode().getFeatureFlag('my-cool-experiment', distinctId);
  if (enabledVariant === 'control') {
        buttonText = 'Control variant';
    } else if (enabledVariant === 'test') {
        buttonText = 'Test variant';
    }
} catch (error) {
  buttonText = 'Error';
}
---
<Layout>
    <html lang="en">
        <head>
            <meta charset="utf-8" />
            <link rel="icon" type="image/svg+xml" href="/favicon.svg" />
            <meta name="viewport" content="width=device-width" />
            <meta name="generator" content={Astro.generator} />
            <title>Astro</title>
        </head>
        <body>
            <h1>Astro A/B Testing</h1>
            <button class="main-button">{buttonText}</button>


            <script>
                const button = document.querySelector('.main-button');
                button.addEventListener('click', () => {
                    window.posthog.capture('home_button_clicked')
                });
        </script>
        </body>
    </html>
</Layout>
Finally, you can remove the client-side flag code added in posthog.astro:
posthog.astro
---


---
<script>
  !function(t,e){var o,n,p,r;e.__SV||(window.posthog=e,e._i=[],e.init=function(i,s,a){function g(t,e){var o=e.split(".");2==o.length&&(t=t[o[0]],e=o[1]),t[e]=function(){t.push([e].concat(Array.prototype.slice.call(arguments,0)))}}(p=t.createElement("script")).type="text/javascript",p.crossOrigin="anonymous",p.async=!0,p.src=s.api_host+"/static/array.js",(r=t.getElementsByTagName("script")[0]).parentNode.insertBefore(p,r);var u=e;for(void 0!==a?u=e[a]=[]:a="posthog",u.people=u.people||[],u.toString=function(t){var e="posthog";return"posthog"!==a&&(e+="."+a),t||(e+=" (stub)"),e},u.people.toString=function(){return u.toString(1)+".people (stub)"},o="capture identify alias people.set people.set_once set_config register register_once unregister opt_out_capturing has_opted_out_capturing opt_in_capturing reset isFeatureEnabled onFeatureFlags getFeatureFlag getFeatureFlagPayload reloadFeatureFlags group updateEarlyAccessFeatureEnrollment getEarlyAccessFeatures getActiveMatchingSurveys getSurveys getNextSurveyStep onSessionId".split(" "),n